
If you're thinking about redecorating a space in your home, we're here to help! Here are some tips for curating and hanging the perfect collage wall.
Step 1: Pick out your décor pieces.
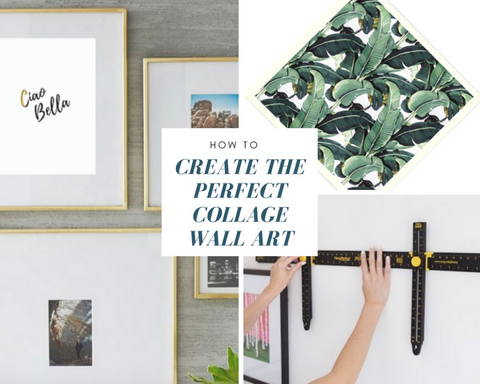
Choose prints and frames that match your personal style, but also make sure all of the pieces and their colors look cohesive together! Our gold foil prints all match with each other really well, and one of our scarves could make the perfect statement art piece for your collage (and it will double as a wearable accessory if you ever want to take it down).
Step 2: Assemble the pieces on the floor first so you know how they should fit together before you start hanging.
Mapping out makes the hanging process go much smoother, and you'll be sure that everything is exactly the way you want it because you took your time and made a plan. Keep in mind how big your wall is and how much space you want to take up.
Step 3: Either attach command hooks to your wall to hang the pictures on, or screw hooks or nails into the drywall.
Be SURE to use a level when attaching the nails and when hanging the pieces on them so they look perfect. If you want everything to be the same distance from each other, a ruler would also be a helpful tool. Do one picture at a time, and take them one by one from your floor setup so you don’t forget where everything goes.
Step 4: Decorative scarves can be hung up with tacks, and picture frames would be extra secure if you added some sticky command strips onto the back.
If the frames don’t have an edge to hang on your hooks/nails, you can just attach a piece of string to the back with super glue.